Charming pine cone wreath concepts that perfectly capture the essence of fall. As autumn envelops the scenery in warm tones and winter hints at frosty days ahead, I often find myself drawn to the genuine appeal of nature-themed decorations.
Among my top picks? Pine cone wreaths! These adaptable adornments elegantly transition from the lingering warmth of autumn to the cool breath of winter, infusing any space with a hint of nature.

Over time, I’ve delved into numerous designs and DIY projects, and I’m excited to present some of my adored pine cone wreath ideas that will invigorate your seasonal decorations. Additionally, I’ll guide you through a detailed tutorial to create your own.
Pine Cone Wreath Inspirations
As the fragrance of pine wafts around, I am inspired by the infinite wreath possibilities these delightful gems provide; here’s my curated list of must-try pine cone wreath designs.
-
Traditional Pine Cones
-
Evergreen Ensemble
-
Bunny-Themed Wreath

-
Full Pine Cone Design
-
Charming Simple Pinecones
-
Purple Themed Wreath

-
Red Ribbon Emphasis
-
Dark Grey Design
-
Vibrant Purple Theme

-
Glittering Green Wreath
Christmas Pine Cone Wreath Inspirations
Throughout my many woodland strolls, I’ve not only gathered pine cones but also an array of creative concepts on how to transform them into stunning wreaths; let’s explore some of my favorites.
-
Christmas Themed Wreath
-
Pine Cones with Cherry Accents
-
Frosted Wreath Design

-
Flocked Snow Wreath
-
Minimalistic Pinecone Decoration
-
Classic Green and Red Wreath

-
Pinecones with Ornaments
-
White and Brown Wreath
-
Holly Decor for Doors
Autumn Pine Cone Door Decorations
Pine cones have always captured my heart, and over the years, I’ve crafted a variety of wreaths inspired by that passion; here are some standout designs.
-
Welcome Fall
-
Charming Fall Wreath
-
Diverse Colorful Pine Cones

-
Simple Acorn Wreath
-
Large Pinecone Arrangement
-
Vibrant Autumn Design

-
Silver-Themed Wreath
-
Green and Brown Color Scheme
Distinctive Pine Cone Wreath Inspirations
Each pine cone I’ve gathered carries a tale, and transforming them into wreaths allows those narratives to come alive; here are the pine cone wreath inspirations that resonate with me.
-
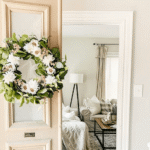
Whimsical Winter White – Last year, I pursued a classic look by painting my pinecones a shimmering winter white. The outcome? An enchanting, frosty wreath that beautifully contrasted with my navy blue door.
-
Glittering Silver Edges – I applied silver glitter glue to the tips of my pine cones. When hung, it appeared as if it had been brushed by the first frost of winter. Highly recommended for those who adore a bit of sparkle.

-
Rustic Sophistication – Intertwining burlap ribbon among the pine cones crafts a wreath that seamlessly blends country aesthetics with a hint of elegance.
-
Merry and Bright – By threading fairy lights through the pine cone wreath, its gentle glow will warm any chilly winter evening.
-
Cheerful Red Berries – Adding cranberries and artificial red berries among the pine cones creates a stunning look that works across multiple seasons.

-
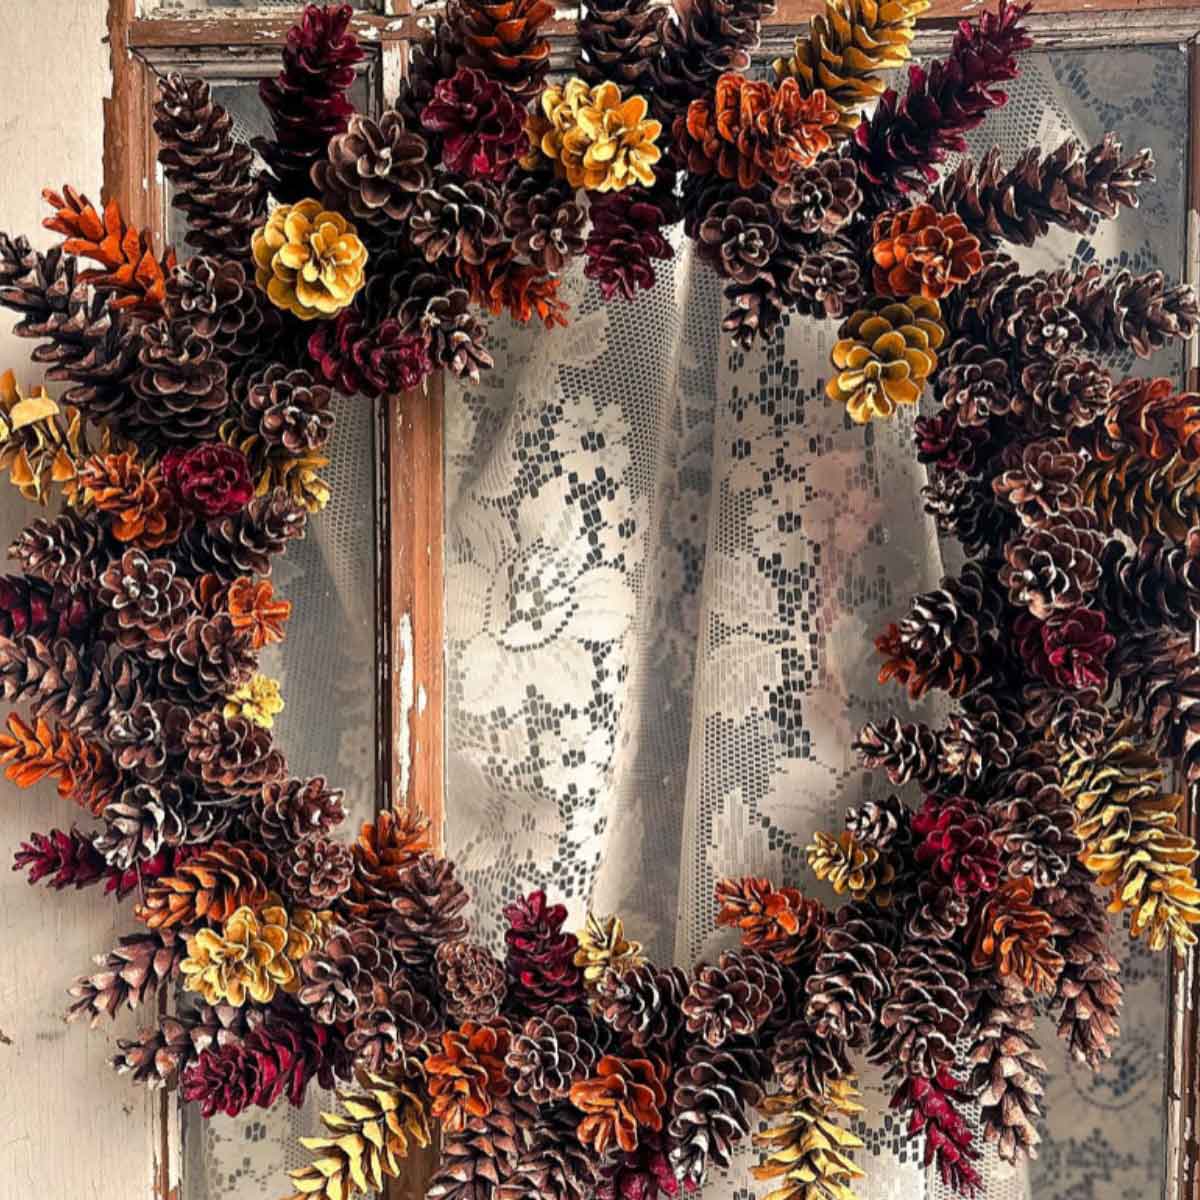
Autumn Tones – I once crafted a gradient of oranges, yellows, and browns on my pine cones. It was a vibrant tribute to fall, gracing my door throughout the season.
-
Woodland Medley – By including other forest finds such as acorns, twigs, and dried ferns, you can create a diverse and tactile wreath that narrates stories of woodland explorations.
-
Aromatic Indulgence – Sprinkling essential oils like cinnamon and pine over my wreath greeted me with nature’s fragrance each time I entered my home. This simple addition makes a world of difference!

-
Coastal Escape – Incorporate seashells into your wreath for an invigorating ocean vibe.
-
Starlit Night – Painting your pine cones rich navy and dusting them with gold specks creates a celestial wreath inspired by the night sky.
-
Edible Beauty – For a bold twist, I mixed pine cones with dried fruits and cinnamon sticks. It not only looked stunning but also infused the air with an enchanting scent.

-
Spring Pastels – By painting pine cones in soft pastel shades and adding delicate Easter eggs, you’ll create a wreath that celebrates the essence of spring beautifully.
-
Bohemian Spirit – Infusing dreamcatcher elements and hanging tassels transforms your pine cone wreath into a whimsical, free-spirited creation.
-
Golden Radiance – A spritz of metallic gold paint on the pine cones can deliver a lavish finish that enhances the elegance of your entrance.

-
Dreamcatcher Design – Center your wreath with a dreamcatcher; it serves as not only a charming focal point but also a guardian against negative energies!
-
Feathery Detail – Incorporating beautiful feathers into your pine cone wreath adds a delicate, natural charm.
DIY Wreath with Gathered Pine Cones
Ah, the wonderful allure of nature’s gifts! Crafting a wreath from collected pine cones is a delightful way to bring a touch of the outdoors into your space. I’ve discovered that the process of creating my own pine cone wreath is both soothing and rewarding. Let’s walk through the steps of designing one for yourself:

Materials Needed:
-
Gathered pine cones (approximately 40-60, depending on size and wreath frame)
-
A wire wreath frame (easily found at craft stores)
-
Floral wire or a hot glue gun
-
Clear sealant spray (optional)
-
Decorative accents (optional) – ribbons, ornaments, faux berries, etc.
Step One: Preparation
Begin by arranging all your gathered pine cones. I prefer sorting them by size to facilitate easier access when I start assembling.
Step Two: Cleaning the Pine Cones
If your pine cones were picked from the outdoors, they might carry some dirt or tiny critters. I gently brush off any debris and bake them on low heat (around 200°F or 90°C) for approximately 45 minutes to clean them effectively. Once cooled, they’re ready for use.

Step Three: Creating the Base
Secure one end of your floral wire to the wire wreath frame. If you’re opting for a hot glue gun, have it plugged in and ready to use.
Step Four: Attaching the Pine Cones
Start by securing your largest pine cones to the wire frame. You can either wrap the floral wire around their bases or apply a dab of hot glue to adhere them directly to the frame. For a fuller appearance, I recommend closely layering them together.
Step Five: Building Layers
After completing the first layer, proceed with additional layers to cover any gaps. Mixing and matching pine cone sizes adds depth and visual interest.
Step Six: Incorporating Decorative Accents
Once you’re pleased with the pine cone arrangement, feel free to weave in decorative accents. I sometimes incorporate ribbons or tuck faux berries for a decorative finish.
Step Seven: Applying Sealant Spray (Optional)
If you wish for your wreath to endure longer and achieve a glossy finish, lightly spray it with clear sealant to keep the pine cones in place.
Step Eight: Hanging Your Wreath
Attach a sturdy ribbon or wire to the top of your wreath frame, ensuring it’s firm enough to support the weight.
Admire Your Creation
Display your wreath on your door, above the fireplace, or any other spot that could use a dash of nature-inspired elegance. Each time I gaze at mine, I’m reminded of the simple beauty that nature bestows upon us.

As days grow shorter and the season shifts, there’s a profound satisfaction in working with elements from the earth. Pine cone wreaths, known for their organic texture and timeless allure, uniquely add warmth to our environments and hearts. I hope the inspirations and DIY suggestions in this article motivate you to unleash your creativity and embrace the joy of handcrafted décor. So, next time you wander through a wooded area, gather those fallen pine cones and let your imagination soar. Here’s to cozy days ahead, adorned with the rustic grace of your own pine cone masterpieces!